Blog

  • What Not To Store In A Storage Unit When Moving to a New Home

    What Not To Store In A Storage Unit When Moving to a New Home

    Knowing what kind of items you can put in storage will help you come up with a storage solution that works best for you when you are moving to another home. You should also be aware of which kind of items you are not allowed to store in a storage unit. For example, you cannot store food or dangerous items such as guns or ammunition.

    Items you should never put into a storage unit for hygiene and safety reasons include, but are not limited to, the items in the list below. You will be responsible for any potential damages to the items and the storage unit if you are not following the storage safety rules.

    Food Items

    You are not allowed to store any type of food in the storage unit, so do not overlook this safety rule.

    First of all, food items left for a prolonged period of time can attract insects or rodents, leading to a much-unwanted infestation problem. The pesky invaders can chew on all sorts of items, nest in them, and destroy your and other people’s belongings in the process.

    Secondly, some foods will rot and start emitting bad odours, thus providing favorable conditions for bacteria and mold to grow. In fact, rotting food items can be the main reason for pest infestation.

    Plants

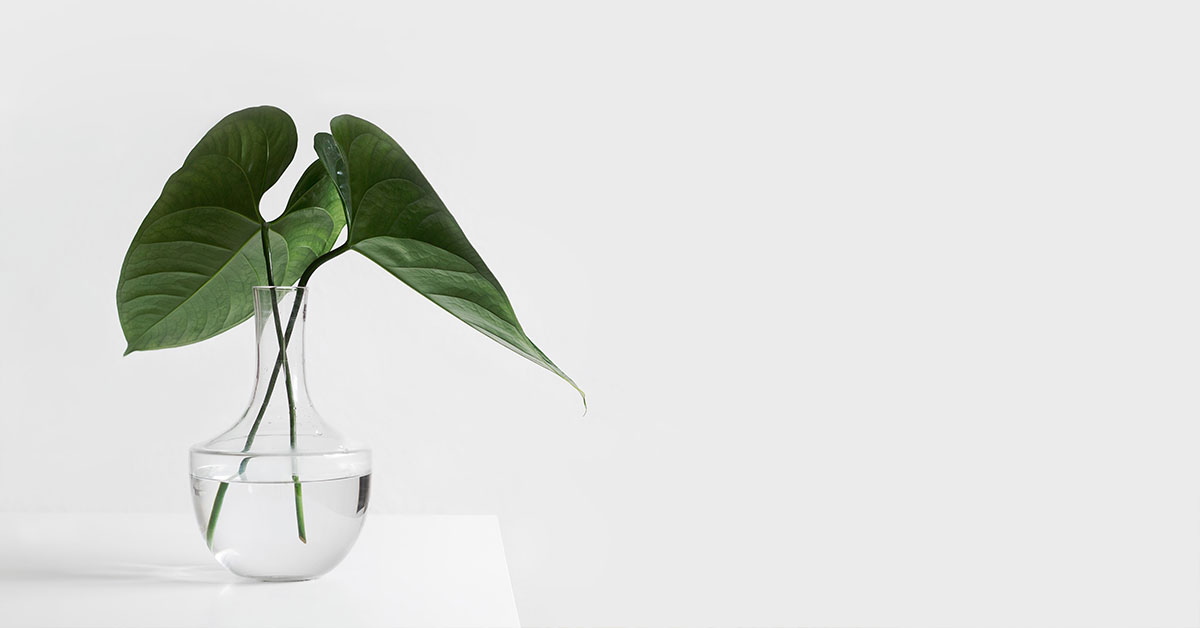
    Plants are another example of what not to store in a storage unit during a move. If you stored a plant in a storage unit, you would deprive your plants of the three basic things they need to live: natural light (sunshine), water, and fresh air. Depriving your plants from these three elements would essentially end the plants’ lives!

    Additionally, plants can attract pests, thus potentially creating significant problems during the renting period. If you want to find a place to keep your plants while you are moving to a new home, we would recommend reaching out to friends or family who can take care of the plants in the meantime.

    Dangerous Items, Including Guns

    Hazardous materials are another important example of what not to put in a storage unit. Any materials that have the potential to corrode, burn, or explode are strictly forbidden by law to be stored at public storage facilities. The reason is more than clear – they pose a serious risk to human health. Dangerous items can lead to costly property damage as well.

    Items that are commonly not allowed in storage units include chemicals, acids, gases, fuel, oils, paints and paint thinners, pesticides, liquor, fireworks, and so on. Request the full list of forbidden items for storage from the storage company you have selected.

    You may be allowed to store a variety of yard equipment – your lawnmower, for instance – only after you have removed all the fuel and oil from their tanks.

    Furthermore, you cannot store any type of guns and ammunition in a public storage facility. Contact a local gun shop to learn more about where and how you can store firearms safely.

    Wet or Scented Products

    Never store wet or damp items in a storage unit. The initial moisture in the items will foster the right conditions for mold and mildew to grow, and when this happens, all of your stored items will be in serious risk of getting damaged forever. Hence, make sure all your items are 100% dry before you store them in a storage unit. This tip is particularly important for clothes and shoes.

    Scented items such as candles and soaps may attract unwelcome guests, such as insects or rodents. To deter unwanted guests from entering your storage unit, avoid putting in storage anything that gives off strong odors.

    High-value or Expensive Items

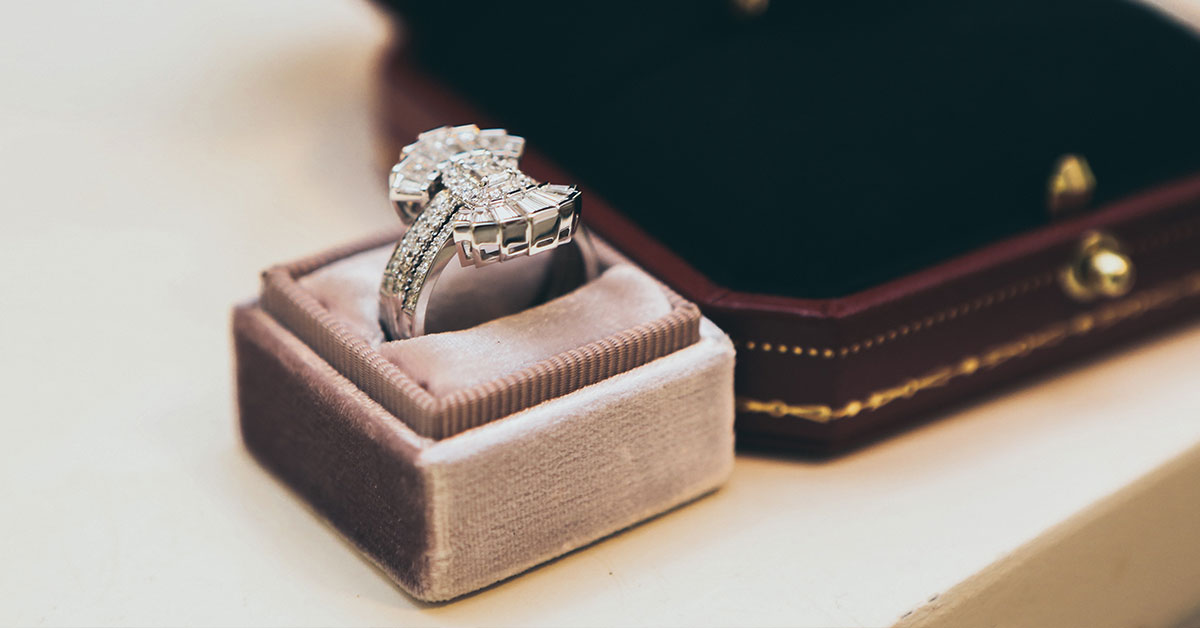
    As a rule of thumb, do not store items that have a high monetary value. Items such as expensive watches, artwork pieces, or jewelry, should not be stored in a storage unit. While our storage units are incredibly secure with 24/7 surveillance, we still recommend storing expensive items in a high-quality personal safe.

    If you do not have other options for storing high-value possessions, please inform us about your intention, and we can discuss the need to purchase additional insurance for your prized possessions.

    Cannabis

    Even though cannabis has been legalized, you are still forbidden to store or grow cannabis in a storage unit.

    Unregistered Vehicles

    Only vehicles that are registered, fully operational, and have storage insurance are allowed to be stored at a storage facility. This includes cars, vans, SUVs, and motorcycles.

    Animals

    You should never leave any live animals in your storage unit. It is not only morally wrong, but it is also against the law to do so. Do not ever leave pets or other animals in a storage unit!

  • 5 Tips for Seasonal and Long-Term Classic Car Storage

    5 Tips for Seasonal and Long-Term Classic Car Storage

    Classic cars are beloved investments that should be kept in mint condition through the year. One of the best ways to keep your classic car in top condition is by investing in seasonal or long-term car storage (visit our Burnaby and Vancouver car storage and White Rock car storage pages for our car storage solutions). Using car storage assures that your classic car is stored in a safe and secure location and the temperature in the facility is suited for keeping a car in top condition.

    Before storing your classic car in a car storage unit, you have to prep your car to assure that it is ready for long-term storage. Here are five tips to prep your car for long-term storage.

    1. Fill the Tank & Change the Oil

    Fill the tank with premium gasoline and add a fuel stabilizer per the manufacturer’s instructions. The fuller the tank, the less chance excess moisture will build up in open spaces, which can cause the tank to rust.

    The fuel stabilizer will prevent the fuel from hardening and gunking up. Make sure you drive the car around for a few miles after adding the stabilizer so it can work itself throughout the system. Then top the tank off before leaving in storage.

    Along with fresh gasoline, make sure the oil has been changed and the oil filter has been replaced. Leaving dirty, old oil in your classic car can lead to premature rusting within the engine. Remember to drive the car a few miles immediately following the oil change.

    In addition to an oil change and refueling, remove the spark plugs and lubricate the cylinders before long-term storage. You can replace the spark plugs after lubricating the cylinders or keep them in a safe place if you don’t want anyone taking your car for a spin while it is in storage.

    2. Get the Car Detailed & Prepped

    This step may seem unnecessary and counter-intuitive, but it is important to store a clean and waxed car. Any dust or debris left on the car in storage can scratch or damage the exterior paint, while dirt and crumbs in the interior can attract unwanted pests and create undesirable odors. Before storing your classic car, give it a good, thorough cleaning and apply a protective wax finish on the exterior.

    After the car wash, prep your classic car even further by doing the following:

    • Add a box of baking soda to the interior of the car to absorb unwanted smells.
    • Block off the exhaust using steel wool or aluminum foil to deter pests.
    • Lubricate door and hood hinges to keep them from jamming up.
    • Don’t forget the wheels! Make sure they are cleaned and dressed before storage.
    • Use a breathable cloth car cover instead of plastic. Plastic covers can trap condensation that can lead to rust.

    3. Fill Tires with Air & Put the Car on Jacks

    It is important to properly maintain your tires in storage because they can be very expensive to replace. First, fill up your tires to the maximum suggested PSI. Then, if you don’t plan on driving the car for a while, jack the car up using jack stands. This relieves the weight from the tires and suspension. The added support will also prevent tires from flat spotting.

    Quick Tip: If you are storing your car on a dirt or stone surface, be sure to add plywood or another hard surface below the tires. This will protect the tires from ground rot.

    4. Address the Car Battery & Fluids

    If you plan on storing your classic car long-term, remove the car battery entirely. If the battery terminal is corroded, carefully clean it with a mixture of baking soda, petroleum jelly, and distilled water. Store the battery off the ground in a climate-controlled environment above freezing temperatures.

    If you will be starting your car every now and then, consider a battery tender (or trickle charger) to keep the battery functioning over long periods of time. However, this option will only work if you have a power source in your storage area.

    Do a quick inspection right before storage and make sure all the fluids are topped off, including antifreeze, brake fluid and transmission fluid.

    5. Choose the Right Storage Location

    Under ideal circumstances, a classic car should be stored in a clean, dark, and dry space. While it may be tempting to keep your car stored in an inexpensive old barn, the dirt floor and light exposure can be damaging. A garage attached to your home is not ideal either because the constant access exposes your car to the elements.

  • Over $101,000 Raised in the 2020 Festival of Trees

    The Victoria Festival of Trees is a cherished community tradition that transforms the Bay Centre into a lush forest of beautifully decorated trees in an effort to raise funds for the BC Children’s Hospital Foundation. Donations to the event help provide the best care imaginable for sick and injured kids from across the province, including the 3,300 kids from Vancouver Island who visit BC Children’s Hospital each year for specialized care they often can’t get anywhere else.

    Despite the unprecedented challenges due the COVID-19 pandemic, and thanks to the generous support of local sponsors and volunteers from the community, the 2020 Festival of Trees raised more than $101,046 for the BC Children’s Hospital! These funds will help fund the research, technologies, and kid-focused care needed to conquer childhood illnesses and create a better future for children across  British Columbia.

    Congratulations to all the sponsors and participants for helping the Festival of Trees raise over $101,000 in funds to continue supporting children’s health in British Columbia!

    To learn more, visit the Festival of Trees website.

  • 6 Ways to Organize Your Storage Unit for Easy Access

    6 Ways to Organize Your Storage Unit for Easy Access

    Organizing your belongings into different categories helps you find items more efficiently in your storage unit. To improve the organization of your storage unit, use these six tips!

    1. Pick one box size for most, if not all, of your items

    Same-size boxes help with stacking and accessibility.Small or medium boxes will be perfect for most of your belongings. Keep in mind that large boxes are excellent for items that aren’t very heavy, but they may not hold up well at the bottom of large stacks. Large boxes are  more difficult to remove if you need something out of them – especially if they are at the bottom of a stack. Need boxes? U-Lock has boxes of various sizes available for purchase at any of our six convenient locations.

    2. Identify the items you may need to access while in storage

    Things you do not use regularly when you are packing may be needed later on. Carefully consider the items you may need while they are in storage, giving extra thought to seasonal items.

    Here are a few things you may need to retrieve from your storage unit:

    • Winter or summer clothing
    • Trip supplies (tents, sleeping bags, snorkeling gear, sleds, cookout utensils)
    • Holiday items (decorations, costumes, bakeware)
    • Kids’ toys (kids may enjoy a “new” box of toys when they get bored of the toys they held onto when packing)
    • Tools and hobby supplies
    • Office documents

    3. Label each box you pack

    Label each box on the top and on at least one side with a unique box number, the room it came from, and the contents of the box. Place a special mark on boxes you may need to access at some point while in storage and remember to put them in your storage unit last. 

    4. Create a master contents list

    Make a list with all the box numbers and write down all of the contents of each box. This might seem like a cumbersome step, but a master list becomes very handy when you need to find a specific item – especially if some of your boxes will be completely out of view.

    If you prefer to keep things digital, there are speech-to-text tools you can use to dictate text so you don’t have to type as you go. Additionally, if you want to take organization one step further (or don’t trust your handwriting), you can print each line from your inventory list to create custom labels for your boxes!

    5. Plan an organized layout for your storage unit

    If you are going to access your unit frequently, you will need to put some thought into how you arrange your storage unit. Ideally, you want to put furniture items against the wall opposite your boxes to leave a path in the middle of the unit. This way, you can access boxes and furniture without any hassle. If you need to use the space in the middle, place items that can be easily moved, to avoid difficulties.

    6. Consider upgrading to a larger unit

    Storing your items in a storage unit like a Tetris game makes retrieving them very difficult. A little extra space can give you room for shelving units and a path through the middle of your unit for easy access to most of your belongings. 

    Hence, it is good to rent a larger storage unit – just slightly bigger than your needs to give yourself some wiggle room. A slightly larger storage unit also gives a bit more leverage if you want to store more items in the near future.
    If you have any questions about renting a storage unit, please contact us and we will be more than delighted to help!

  • 6 Storage Unit Tips For Vancouver Homeowners Who are Downsizing

    6 Storage Unit Tips For Vancouver Homeowners Who are Downsizing

    With many homeowners downsizing and choosing more compact and cozier homes, finding additional storage space around the house to put items away can be challenging. To help you maximize the space you have, we have come up with six storage tips you can use, including renting a storage unit, leveraging vertical storage, and more. Check them out!

    Rent a Storage Unit

    Renting a storage unit in Vancouver or Burnaby is the best solution for your storage needs. By renting a storage unit that is approximately the size of a closet or slightly bigger than a storage unit, you will gain enough space to fit items that you have laying around your home.

    To start, you can rent a 5 x 5 feet unit, which is equivalent to a regular closet. If you only have a few items around your home to store, the 5 x 5 feet storage unit will surely meet your needs! If you have more items to store and need a bigger space, you can rent a 5 x 7 feet storage unit.

    Additionally, we have a 5 x 10 feet storage unit available. This storage unit size is equivalent to a walk-in closet and it is ideal for those who want to store documents, clothes, spare pillows, or other home items.

    Renting a storage unit at U-Lock Mini Storage Burnaby is a top solution for your storage needs because you can choose a storage unit size that fits your demand, select a rental period based on your needs since we offer month-to-month contracts, and you will be storing your belongings in a secured, gated facility, which is monitored 24/7 with a digital surveillance system.

    Shelving Above Toilets

    Nothing is worse than a tiny bathroom overrun with towels on the floor and toiletries stuffed under the vanity. To keep your bathroom and powder rooms clutter-free, we suggest adding shelving above the toilet. If you are renting and unable to install free-floating shelves on the walls, you can try using a stand-alone shelf unit that fits over the toilet. 

    This extra storage frees up floor space in the bathroom, as well as shelf space inside your vanity.

    Storage Beds

    Do not waste precious bedroom space with armoires and dressers. Instead, opt for a storage bed when downsizing to smaller rooms. Storage beds typically come with four or more drawers underneath, attached to the bed frame. This provides more space to store clothes and necessities under the bed instead of inside a bulky, space-hogging chest of drawers.

    Hooks

    Need to get organized? One word: hooks! Hooks are inexpensive and easy to install – they are one of the best storage solutions for small spaces. We recommend installing them in your entryway, laundry room, mudroom, bathroom, garage, closets and pantries. You can use hooks to hang belongings such as clothes, towels, brooms, umbrellas, hats, and dog leashes – among many others.

    Bins and Baskets

    Storing belongings inside bins and baskets is one of the most affordable and most aesthetically pleasing ways to save space when downsizing. They can be placed almost anywhere, including entryways, kitchens, closets, bedrooms, bathrooms, and pantries. Decorative bins and baskets are easy to come by and they help make the home both stylish and organized. When using bins or baskets, we recommend adding labels to them as well.

    Drawer Organizers

    One easy way to help eliminate the mess in your various drawers is to simply add drawer organizers. These will save you space by allowing you to more easily and efficiently store everything from makeup and toiletries to office supplies and kitchen utensils inside your drawers. These organizational trays can be used in kitchens, pantries, bathroom vanities, and desks.

    While downsizing to a more compact place means that you will have less space in your new place compared to your previous property, there are quite a few ways for you to maximize your space. By renting a storage unit or using bins or hooks, you can make the best out of the space in your home! If you have any questions about storage units, please contact us and we will be more than delighted to help!

  • Motorcycle Storage in Vancouver and Burnaby: 5 Motorcycle Storage Tips You Can Use

    Motorcycle Storage in Vancouver and Burnaby: 5 Motorcycle Storage Tips You Can Use

    Using motorcycle storage to properly store your bike is critical in extending it’s useful life. Doing so will help prevent damage from rust due to rain or snow, or from other vehicles passing by and scratching your motorcycle.

    To help you properly store your motorcycle, here are some tips you can use :

    1. Remove all dirt and debris from exterior surfaces

    First, thoroughly clean and dry all surfaces of the bike. This step seems like an obvious one, but its importance cannot be emphasized enough. Cleaning a bike that won’t be on the road sounds like a thankless job, but it is one that will save you time and headaches in the long run. Any dried-on bugs, dust, or spotting will only become harder to clean off once it has been sitting for a long season.

    2. Lubricate all moving motorcycle parts

    If you plan to store your motorcycle for more than a few months, make sure you lubricate all essential internal components with a light coat of oil to prevent unwanted moisture buildup.

    One way to do this is to remove the spark plugs, then put about a tablespoon of oil into the holes. Turn the engine over and coat the cylinder walls by spinning the rear tire while the bike is in gear. Make sure to add back spark plugs when you are done.

    Everything that is usually lubricated in a motorcycle should be checked shortly before storage. Check the chain, cables, and controls to be sure everything is freshly lubed up to withstand the cold and dry winter air.

    3. Fill up the gas tank and add a fuel stabilizer

    Stop by a gas station that is closest to your storage location and top off the fuel tank. Once you do, add a touch more. A full tank is essential for keeping moisture down on the tank walls.

    After the tank is full, add a fuel stabilizer and then take the motorcycle for a short drive to the storage destination. Do not add the fuel stabilizer at the storage location or it will not have a proper chance to mix into the fuel system.

    Another option worth mentioning for long-term motorcycle storage is to drain the tank of fuel completely. If you do this, you will need to line the tank with a fogging oil to prevent rust. We recommend this method if you plan on storing your motorcycle for six months or more.

    4. Change the oil and replace the filter

    Old oil that sits in storage can quickly corrode engine components. This is not ideal for any motorcycle that will be stored for longer than a month. After you took the motorcycle for one last ride and topped off the fuel, change the oil and replace the filter.

    Purchase an oil that is primarily for winter use and follow the instructions. Remember to add the appropriate amount of antifreeze to your coolant system, which is an especially important step for winter motorcycle storage.

    5. Remove the battery and hook it up to a trickle charger

    You can either remove the battery entirely, or, for shorter-term winter storage, keep it on the bike. If you decide to keep the battery on, make sure you turn the bike on every month or so to charge the battery. The best way to go is to remove the battery and store it in an entirely different location that will not have fluctuations in temperature.

    Once the battery is disconnected, and the electrodes are cleaned, hook it up to a trickle charger all winter long.

    6. Take the weight off the tires to avoid flat spots

    The best way to store a motorcycle is with all the weight off the tires. This can be accomplished by using motorcycle stands; the weight relief will prevent uneven tire wear or flat-spotting.

    If a stand is not an option, try to hoist the bike up on the front tire and alleviate the weight from the back tire. Make sure to rotate the front tire every few weeks.

    If your only option is to leave the bike on the ground, fill the tires to the maximum PSI. Next, line the floor with carpet or plywood to act as a barrier from moisture. Lastly, make sure to rotate the tires by rolling the motorcycle every so often.

  • Storage Unit Tips: How to Organize Your Storage Unit

    Storage Unit Tips: How to Organize Your Storage Unit

    Need a place to store your belongings? Consider renting a self storage unit from a storage facility near you. At U-Lock Mini Storage, we offer storage units to those who seek temporary or long-term storage.

    Renting a storage unit helps you gain the additional space you need to store items that you do not want laying around your home, or office documents and supplies.

    To help you organize your storage unit, we have prepared five tips you can use. Enjoy!

    1. Create a List of All Your Inventory

    When placing a lot of items in storage, it is difficult (if not impossible!) to remember each and every item you need to store. While large furniture pieces, such as a bed or sofa, are easy to remember, smaller items such as artwork, pictures, electronics, and clothes, are oftentimes forgotten. To keep track of everything you need to store, create and maintain a list of all items you want to store. You can create a Microsoft Excel spreadsheet to keep track of the items and their descriptions. Creating such a list will help you organize your storage inventory much more easily.

    2. Disassemble Furniture and Store Items Upright

    To maximize space and organize your belongings more efficiently, disassemble large furniture items prior to placing them in the storage unit. This includes taking apart headboards, bed frames and mattresses, as well as disassembling table legs – among other items. We recommend storing individual items in a vertical position towards the back of a storage unit (except for mattresses, which should be stored laying flat). By storing furniture such as headboards upright and on the side, you will save on floor space for other items. Tip: if your dining table doesn’t come apart, try using it as extra shelving inside the storage unit for stacked boxes. 

    4. Store Large, Heavy Items on the Bottom and Towards the Back

    As you begin packing items inside the storage unit, start with large, heavy belongings such as furniture and heavy boxes. Place them towards the back of the storage unit at the bottom. Remember that unless you want to crush smaller and/or lighter boxes, heavy items should always be stored at the bottom of the storage unit. Doing this creates a stable base for lighter items.

    5. Place Items You Need More Frequently Towards the Front

    Chances are, there are some items you plan on using more frequently than others. For instance, that extra bed for which you no longer have room, likely won’t see the light of day for a while, whereas your baby’s pack ‘n play will. Other items that you are sure to need more often include seasonal clothing such as heavy coats, boots, hats, flip-flops, and swimsuits. While you will not need these items every day, you will be making trips to the storage unit to retrieve them at least once a year. These types of belongings should be placed towards the front of your storage unit in well-labeled boxes or bins. Placing them in an easy-to-reach spot near the door will save you the trouble of having to dig through mountains of boxes every time you go to the storage unit.

    6. Remember to Go Vertical

    When packing and organizing your storage unit, remember to go vertical with your belongings. Boxes should be stacked high and furniture should be stored upright. If you happen to be storing bookcases or anything with shelving, take advantage of the extra storage space. To make room for smaller boxes and belongings, consider adding wire shelving or hanging shelves to the storage unit as well. If the storage unit is particularly high, you may want to consider keeping a foldable ladder or step stool inside the unit with your belongings.

    7. Write Labels

    We cannot emphasize enough how important it is to label every box and bin inside a storage unit. You may think you will remember where you put those family photo albums but, trust us, you won’t – especially if they have been sitting in storage for a long period of time. Label every box clearly with either a permanent marker or printed sticky labels. Make sure the labeled part of the box is facing the front of the storage unit, so you can easily see it upon entering.

  • How To Declutter Your Home with A Storage Unit in the New Year!

    How To Declutter Your Home with A Storage Unit in the New Year!

    Happy New Year! We hope you enjoyed a wonderful holiday season safely with your loved ones, with scrumptious food and lovely gifts! 

    While the holiday season is a terrific, festive time, it is also a period that can easily make your home messy. To help you kickstart your year with a clean slate, we have put together four tips you can use to declutter your home. Check them out!

    Get Organized

    When you are taking down holiday decorations and tidying up your home, you can also consider storing or getting rid of items that are simply laying around the house. For example, seasonal clothes you do not wear often, CDs you do not listen to anymore, or other similar items can be organized together and stored somewhere else outside your home. You can also donate items such as electronics and clothes that others may find useful.

    When gathering all the items that you want to donate, get rid of, or store, categorize the items and create a spreadsheet listing all of them. For example, you can create  a Microsoft Excel spreadsheet and create a category called “sweaters”. Once the list has been created, add descriptions of the sweaters in the list so you know which items will go in which box when you start packing the items down the road.

    Buy Storage Supplies

    After you have created categories and placed each belonging in their respective category, you can buy storage supplies, including:

    • Cardboard boxes
    • Storage file boxes
    • Packaging tape
    • Scissors

    At U-Lock Mini Storage, we sell quality and economical cardboard boxes. If you are looking to buy cardboard boxes, please contact one of our storage unit facilities near you and we will be delighted to help!

    Our locations are:

    Box Your Belongings

    Once you have purchased all the necessary supplies, it is time to box your belongings according to the categories you created. 

    When boxing your belongings, it is recommended to place boxes that have the same category in the same area. For example, if you have several boxes labeled “old sweaters”, you can gather these boxes in the same area in your home so when you pick the boxes up and move them to a storage unit or a donation centre, you can find these boxes more easily.

    Book a Storage Unit

    Now that you have boxed all your items and identified the ones you want to donate, get rid of, or store, you can book a storage unit

    You can choose a storage unit size according to the size and number of boxes you have. To start, you can book a 5 x 5 feet storage unit. This storage unit size is equivalent to a regular closet where you can store personal items, clothes, boxes, skis, children’s toys, small furniture items, or business records and supplies etc.. If you want something a bit bigger, we recommend upgrading to a 5 x 7 feet storage unit.

    If you have any questions about storage units, please feel free to contact us!

    Find Resources or an Extra Hand for the Move

    The final step in decluttering your home with a storage unit is seeking resources to help you store your items. Whether it is booking an appointment with a moving company, finding friends for extra muscle, or renting a moving truck, make sure you have found all the necessary resources you need to store your belongings in a storage unit seamlessly!

    Questions? Feel free to call us at 1.866.647.8673 or contact us online, and our staff will be more than happy to answer any questions you may have!

    Looking to reserve a storage unit? Find a self-storage facility near you:

  • 5 Storage Solutions When Moving to a Small Apartment in Vancouver

    5 Storage Solutions When Moving to a Small Apartment in Vancouver

    If you are moving into a studio, a one-bedroom apartment, or even a two-bedroom apartment in Vancouver, you may not have enough space to fit everything you have.

    To help you make the best out of your apartment, here are five storage solutions that you can use!

    Rent a Storage Unit

    Renting a storage unit in Vancouver or Burnaby is the ideal solution for your storage needs. By renting a storage unit that is approximately the size of a closet or slightly larger,  you gain enough space to fit items that you have laying around your home that won’t necessarily fit in your new apartment.

    To start, you can rent a 5 x 5 feet unit, which is equivalent to a regular closet. If you only have a few items or documents to store, the 5 x 5 feet storage unit will surely meet your needs! If you have more items to store and need a bigger space, you can rent a 5 x 7 feet storage unit.

    We also have a 5 x 10 feet storage unit available. This storage unit size is equivalent to a walk-in closet and it is ideal for those who want to store documents, clothes, spare pillows, or other home items.

    Renting a storage unit at U-Lock Mini Storage Burnaby is a top solution for your storage requirements because you can choose a storage unit size and select a rental period based on your needs. We offer month-to-month contracts, and you can store your belongings in a secured facility. Our storage unit facility is gated and monitored 24/7 with a digital surveillance system.

    Purchase a Storage Bed or Sofa Bed

    When an apartment size is minimal, it is important to make sure all items in your space serve a purpose, or several. When choosing a bed, we recommend opting for either a storage bed or a sofa bed. Storage beds are helpful because they act both as a bed, and as storage  with drawers typically located underneath the bed where you can keep clothes. Sofa beds in turn, can be used as both a couch and a bed. These are particularly helpful for those moving into a studio apartment where space is tight.

    Implement Wall-mounted Shelves

    Adding wall-mounted shelving is an easy storage hack for a studio or a smaller apartment. Wall-mounted shelves can be used in a kitchen to hold dinnerware, in a bathroom to hold toiletries, or in a living room or den to hold books and movies. This vertical storage solution helps free up space on the floor, while also keeping items in an easy-to-access location. Open shelving provides stylish and functional decor to your home as well.

    Remove Unnecessary Belongings on a Regular Basis

    The best way to maximize space in a smaller apartment is by avoiding clutter. That means purging any and all unnecessary items. From clothes that no longer fit to outdated furniture from your college days, it may  be time to finally cut the dead weight. Fortunately, it is easy to do, thanks to donation organizations and online consignment marketplaces. Consider donating furniture and clothes to your local charity!

    Install Floating Furniture on the Walls

    In addition to freeing up floor space, floating furniture makes a room appear bigger than it actually is –  that teeny tiny apartment will not seem so tiny after all. Examples of popular floating furniture include TV consoles, office desks, bathroom vanities, and dressers. These items will help maximize the space inside the apartment, while also serving a functional purpose.
    Want to book a storage unit? Check out our wide selection of storage unit sizes at U-Lock Mini Storage Burnaby, or contact us via phone at 604.438.8909 or contact form. We will be delighted to answer any questions you have!

  • 5 Reasons Why Vancouver Businesses Should Rent Storage Units This Holiday Season!

    5 Reasons Why Vancouver Businesses Should Rent Storage Units This Holiday Season!

    As we enter the holiday season,  also  known as the shopping season, retailers need to ensure that their logistics are prepared for the surge in shopping. One major component of ensuring that the logistics process is seamless is making sure that you have sufficient storage space to hold the surplus amount of inventory you have ordered for the holiday season. One easy and economical way to gain access to additional storage is by renting a storage unit. Here are six reasons why Vancouver businesses should rent storage units this holiday season.

    Make Room For Promotional Items

    If you have ordered more stock for items you want to promote this holiday season or you want to make more room for holiday-specific promotional products or services, you can rent a storage unit and place items that you do not need to showcase during the holiday season. This will help clear the space needed for your holiday products and services. 

    If you do not have a tremendous amount of inventory that you want to store, you can rent a smaller unit such as the 5×5 feet storage unit which is equivalent to a regular closet. If you have more items to store and need a bigger space, there is also a 5×10 feet storage unit available. This storage unit size is equivalent to a walk-in closet.

    Secure Your Inventory

    While you can store some items at the back of your store, it may not be ideal if your store is not particularly secure. Having your store broken into and inventory stolen during the busy holiday sales season is definitely something you want to avoid. By storing your inventory in a storage unit, you are guaranteeing that your inventory is safely stored in a highly secured storage facility.

    At U-Lock Mini Storage Burnaby location, our storage facility is monitored 24 hours a day using digital surveillance. Additionally, we offer storage units that have individual alarms installed, which means that an alarm will be triggered when a trespasser attempts to break into a storage unit.

    To further enhance the security of the perimeter, we give each renter a unique access code that they must dial to enter the storage facility and unlock their self-storage unit. Each renter also must enter their unique access code to lock their storage unit and exit the building. This mandatory procedure lets the storage facility keep track of who goes in and out, thus preventing trespassers from entering the storage facility. Compared to storing inventory in a shed, in a backyard or in a garage, storing your inventory in a storage unit is exponentially safer and more secure.

    More Affordable Than A Warehouse

    We have a variety of storage unit sizes for you to select from and you can select a size that fits your inventory needs. We offer storage unit sizes from anywhere between 5×5 feet to 10×30 feet and our rates start at only $73 per month.

    Renting a storage unit to hold your inventory is a more cost-effective solution than using a warehouse because you can rent a storage unit based on your inventory size and budget, and because you always have the flexibility to switch to a smaller or bigger unit. If you have a lot of inventory at the beginning of the holiday season and your inventory is slowly depleting as you approach January or February, you can start with a larger unit size such as 10×10 feet and move down to 5×10 feet.

    Month-to-Month Contract With No Long-Term Commitment

    As mentioned above, you always have the flexibility to switch to a bigger or smaller storage unit according to your needs because storage facilities, such as U-Lock Mini Storage, do not require monthly contracts. This autonomy lets you switch between different unit sizes from one month to the next. For example, if your inventory is running low towards the beginning of the year and you do not plan on ordering a large number of products to replenish your inventory, you can downsize to a smaller unit.

    Convenient Accessibility

    To accommodate our customers’ schedules, we offer increased operating hours. You can have access from 6 am to 9 pm, 7 days a week, all year long. Please check your local U-Lock Mini Storage facility for extended hours!